
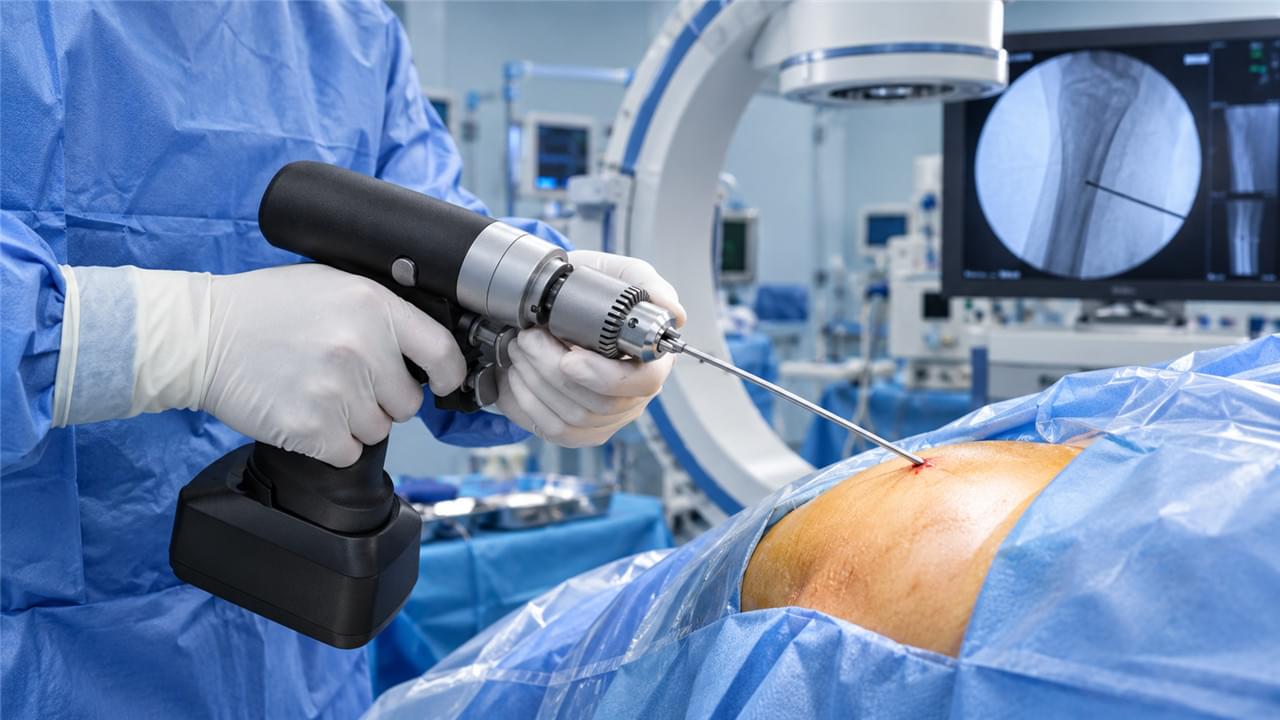
This article is part of our comprehensive guide: External Fixator Solutions: Types, Clinical Applications & Bone Fracture Recovery
TL;DR: Minimally invasive external fixator insertion — applying a frame through small stab incisions without ever opening the fracture site — slashes soft tissue trauma compared to open approaches. 🦴 The technique preserves the fracture hematoma (the biological engine of healing), cuts blood loss, lowers infection risk, and gets patients moving sooner. This guide walks the five-step MIS technique, the safe pin corridors that keep neurovascular structures out of harm’s way, the errors that ruin constructs, and the evidence behind it all.
🧬 The Philosophy: Why Less Exposure Means Better Healing
Traditional orthopedic surgery opened fractures to directly visualize and reduce fragments. The biological bill was steep:
- 🔪 Stripping periosteum destroys the primary vascular envelope for fracture healing
- 🧪 Opening the fracture hematoma — rich in growth factors and healing precursor cells — throws away a key healing resource
- 🦠 Large wounds create dead space for bacterial colonization and demand more healing energy
The MIS approach achieves stabilization the opposite way:
- 🤲 Closed reduction: alignment achieved by manipulation under fluoroscopy, fracture never opened
- 📍 Percutaneous pin insertion: half-pins through 5–8 mm stab incisions — minimal tissue disruption
- 🌱 Biological fixation: hematoma intact, periosteum unstripped, soft tissue envelope preserved
Why Minimally Invasive External Fixator Surgery Heals Better
The philosophy in one line: the surgeon stabilizes, biology does the healing. By refusing to breach the fracture zone, the technique keeps every healing resource where it matters — which is why closed fracture stabilization produces reliably faster union, lower infection rates, and better functional outcomes for appropriate fracture types. The frame is scaffolding; the body builds the bridge.
🧑⚕️ Patient selection still matters. MIS shines for diaphyseal and extra-articular fractures amenable to closed reduction, polytrauma patients who need rapid stabilization, and contaminated wounds where internal hardware is contraindicated. It is the wrong tool for fractures requiring absolute articular surface reconstruction under direct vision — there, an arthrotomy is a feature, not a failure. Match the technique to the fracture personality, not to the surgeon’s preference.
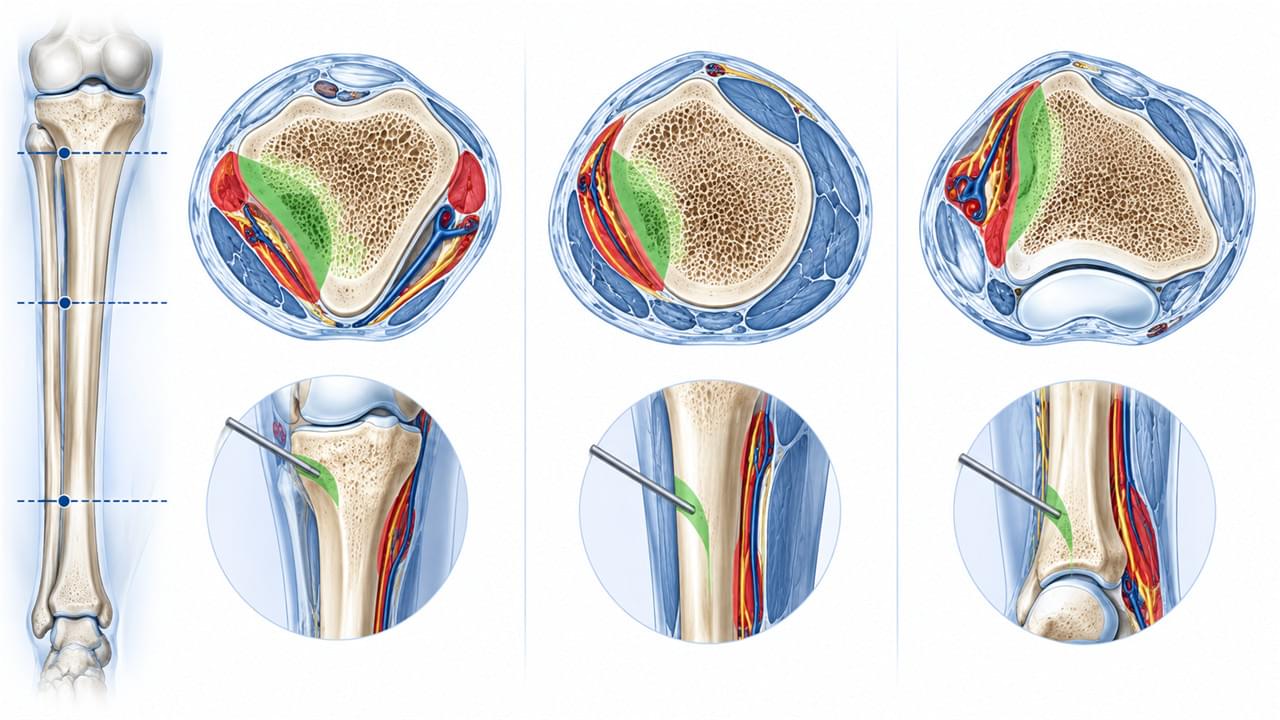
🗺️ Anatomical Considerations: Safe Pin Insertion Zones
The Geography of Minimally Invasive External Fixator Pin Placement
The single most critical skill in the whole technique is safe pin placement — because a pin that wanders outside a safe corridor meets nerves and vessels, not just bone. Learn the corridors per anatomical zone before the first incision. 🧭
Tibia: Safe Pin Zones
| Pin Location | Safe Approach | Structures to Avoid |
|---|---|---|
| Proximal tibia | Anteromedial (flat subcutaneous surface) | Common peroneal nerve (lateral); saphenous vein (medial) |
| Tibial shaft | Anteromedial | Anterior tibial artery (lateral compartment) |
| Distal tibia | Anteromedial | Tibialis anterior tendon (anterior) |
Femur: Safe Pin Zones
| Pin Location | Safe Approach | Structures to Avoid |
|---|---|---|
| Proximal femur (subtrochanteric) | Lateral through vastus lateralis split | Femoral nerve/artery (medial) |
| Distal femur | Lateral or anteromedial | Popliteal vessels (posterior); femoral artery (medial) |
Forearm: Safe Pin Zones
| Pin Location | Safe Approach | Structures to Avoid |
|---|---|---|
| Radius (proximal) | Dorsal (between ECRL and EDC tendons) | Radial nerve (anterior); posterior interosseous nerve (lateral) |
| Radius (distal) | Dorsoradial | Extensor pollicis longus (medial) |
| Ulna (any level) | Subcutaneous border — safe at all levels | None on the subcutaneous border |
Practical shortcut: the ulna’s subcutaneous border and the tibia’s anteromedial face are the two “forgiving” corridors every surgeon should know cold. Everything else deserves a moment’s anatomy review. 📖
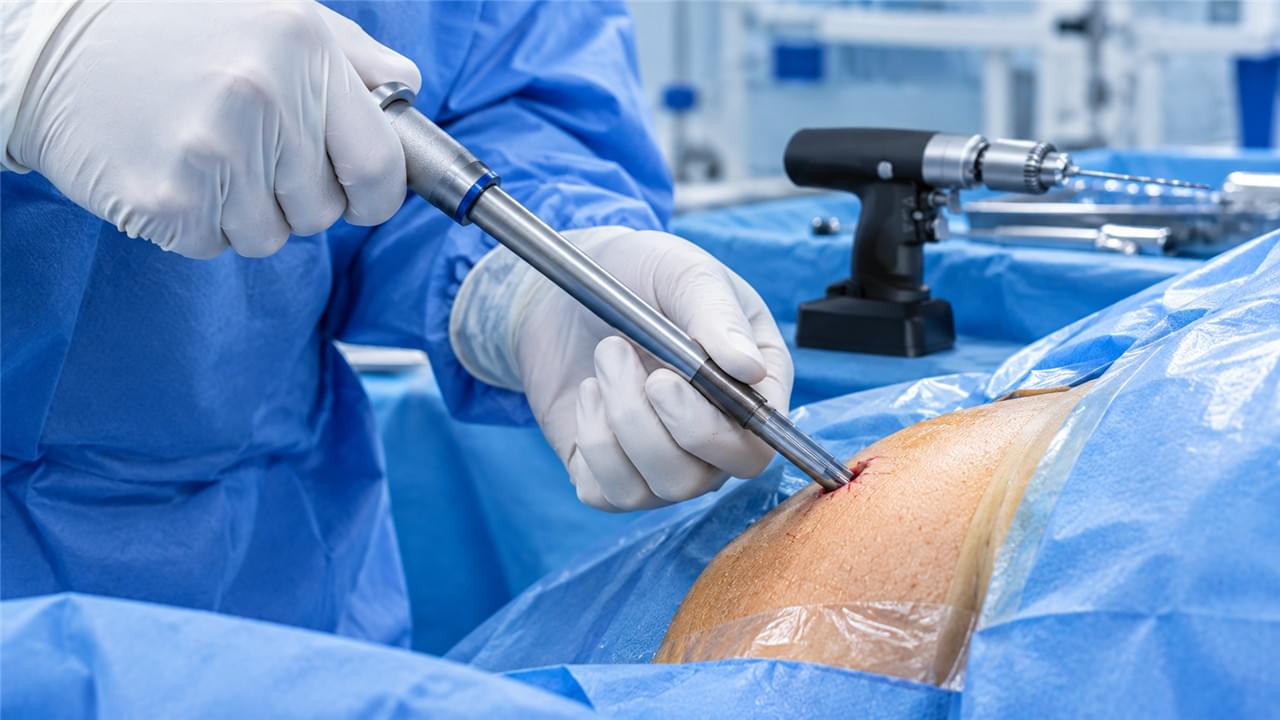
🔧 Step-by-Step Technique: The 5 Steps
Preparation and Equipment
- 🔋 Battery-powered drill, 300–600 RPM, for pin insertion — modern MIS-ready surgical power tools make this step more reproducible
- 📦 Half-pin set (diameter matched to patient anatomy)
- 🔩 External fixator components: bars and clamps
- 🩻 Fluoroscopy C-arm — essential, non-negotiable
- 🩹 Tourniquet (optional; useful for extremity procedures)
Where imaging is the constraint, see our guide to cannulated drills in MIS orthopedic surgery for instrument selection.
Step 1: Closed Fracture Reduction
Under fluoroscopy, manipulate the limb to achieve reduction — this is classic closed fracture reduction:
- ⬇️ Traction: longitudinal pull restores length and corrects impaction
- ↔️ Translation: direct pressure over the bone corrects sideways displacement
- 🔄 Rotation: limb rotation corrects rotational malalignment
- ✅ Confirm reduction in two planes (AP and lateral) before any pin goes in
Maintaining reduction: an assistant holds it while the surgeon places pins — reduction lost before the frame is assembled is reduction lost for good. Alternative: temporary K-wires hold alignment while pins are placed.
💡 A quality check worth the extra thirty seconds: after two-plane confirmation, rotate the limb through a full arc under fluoroscopy before pinning. A reduction that looks perfect in static AP and lateral views can still reveal rotational deformity the moment the limb moves — and rotation is the displacement most likely to sneak past you. Catch it before the pins, not after the frame is torqued down.
Is fluoroscopy really required? Yes. Without intraoperative imaging you are reducing blind and placing pins blind — the surest route to malreduction and malpositioned hardware. If no C-arm is available, this is not the technique for that case.
Step 2: Safe Corridor Identification & Stab Incision
At the chosen pin site within a safe corridor:
- ✂️ Make a 5–8 mm longitudinal stab incision — longitudinal orientation minimizes tendon and vessel risk
- 🥢 Blunt dissection with a curved mosquito hemostat down to bone — never cut through muscle with scissors
- 🛡️ Advance a soft tissue protection sleeve (trocar) to bone before any drilling
How small is “small enough”? A 5–8 mm incision suffices for most long-bone half-pins — smaller than many keyhole laparoscopic ports. The blunt dissection after the skin incision is what actually protects neurovascular structures and tendons.
Step 3: Drill and Pin Insertion
- 🪛 Pre-drill one size smaller than the half-pin diameter at 300–600 RPM — intermittent advance-and-withdraw to clear debris
- 📏 Confirm depth with a depth gauge
- 🔩 Insert the half-pin by hand until cortical resistance, then advance through the far cortex at minimum speed with a T-handle or powered driver
- 🩻 Confirm bicortical purchase under fluoroscopy
Why the speed limit? Excessive RPM generates heat at the bone-pin interface → thermal necrosis → pin loosening → instability → pin tract infection. The 300–600 RPM range with intermittent drilling gives penetration without the burn.
Step 4: Frame Assembly
- 🔗 Apply connecting bar and clamps to the first pin loosely
- 📍 Insert remaining pins through separate stab incisions
- 🔩 Attach all pins to the frame
- 🩻 Final reduction check in two planes
- 🔧 Tighten all clamps in sequence — proximal first, then distal — while the assistant maintains reduction
- ✅ Final fluoroscopy: fracture aligned, pins bicortical, nothing entering the joint
Step 5: Wound Management
- 🧵 Close stab incisions with a single absorbable suture or steristrips
- 🩹 Apply sterile foam pin-site dressings
- 🗣️ Teach pin-site care before discharge — two minutes of teaching saves weeks of antibiotics
Because the incisions are tiny, patients routinely underestimate them — which is exactly how pin-site trouble starts. Give written instructions alongside the verbal walkthrough: daily cleaning, signs of infection to watch for, and a firm rule against poking or dressing the pins at home with improvised materials. Small wounds, big consequences when neglected.
📊 The Clinical Evidence: MIS vs. Open Fixation
Minimally Invasive External Fixator Outcomes: What Studies Show
Multiple clinical studies back the biological argument with numbers:
| Outcome Measure | Open External Fixation | MIS External Fixation |
|---|---|---|
| Wound complications | Higher | Lower |
| Pin tract infection | Comparable | Slightly lower (less tissue devitalization) |
| Blood loss | Higher | Minimal |
| Operative time | Longer | Shorter |
| Time to weight bearing | Longer | Earlier |
| Bone union rate | Standard | Equal or higher (biological preservation) |
| Functional scores (1 year) | Standard | Equal or superior |
The pattern across these measures is consistent: where the open approach pays a tissue price, MIS avoids it — and the differences compound over the healing period rather than washing out. Shorter operative time also matters beyond the drapes: less anesthesia exposure for fragile trauma patients is an outcome in its own right.
And how does it compare to MIPO (minimally invasive plate osteosynthesis)? Both preserve soft tissue biology. MIS external fixation is faster, immediately modifiable, and avoids internal implants in contaminated wounds; MIPO gives definitive fixation without a frame but demands clean tissue. In complex open fractures the sequence typically runs MIS frame first, conversion to MIPO once conditions allow. Principles are well documented by the AO Foundation and AAOS . For the trauma context where frames earn their keep first, see our open fracture emergency management guide.
⚠️ Common Technical Errors — and How to Avoid Them
Mistakes That Ruin a Minimally Invasive External Fixator Construct
| Error | Consequence | Prevention |
|---|---|---|
| Pin outside safe corridor | Neurovascular injury | Verify anatomy; use soft tissue sleeves |
| Unicortical pin purchase | Pin loosening, loss of stability | Confirm bicortical purchase under fluoroscopy |
| Excessive drilling speed | Thermal bone necrosis → loosening | 300–600 RPM; intermittent withdrawal |
| Frame tightened before reduction confirmed | Permanent malreduction | Two-plane confirmation before final tightening |
| Pins too close to the fracture zone | Compromised stability; pin-site fracture | Keep a minimum 5 cm from the fracture |
Notice the pattern: nearly every disaster here is preventable with patience — a sleeve placed, a speed respected, a fluoroscopy check before the final turn of the wrench. 🔍
🌍 Equip Your Surgical Suite with MIS-Ready Systems
Vsun Medical’s external fixation systems are built for minimally invasive application — soft tissue protection sleeves, fluoroscopy-compatible components, and complete MIS technique documentation — manufactured under GMP standards with ISO certification and a 2-year warranty. 📦
Browse the full external fixators product range or request MIS fixator technical documentation directly →.
GMP Compliant · ISO Certified · 2-Year Warranty · MIS Application Ready
 English
 Arabic
 German
 French
 Italian
 Spanish
 Russian
 Japanese
 Korean
 Turkish
 Portuguese