
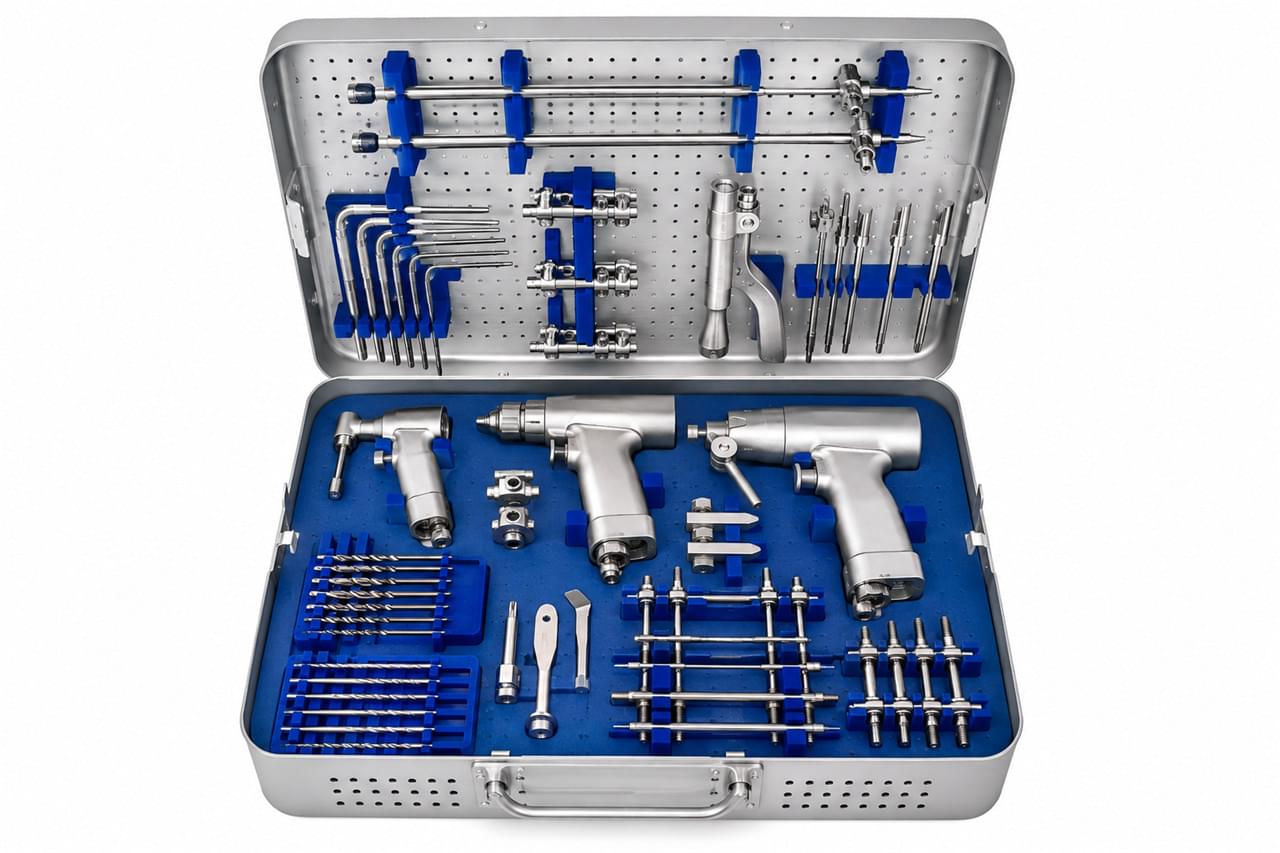
📘 This article is part of our comprehensive guide: Veterinary Orthopedic Surgery: Modernizing Animal Surgical Care
TL;DR: Putting together a veterinary orthopedic instrument set is one of the most important buying decisions a practice will make before offering surgical services. This guide walks through caseload-based planning, the essential power tools and fixation hardware, hand instruments, sterilization requirements, and three clear budget tiers — from a basic start to a full specialist suite. Supplier evaluation criteria round out the picture.
📊 Plan First: Assess Your Caseload
Sizing Your Veterinary Orthopedic Instrument Set to Caseload
Before you spend a dollar, define your expected case profile. The right starting point depends entirely on how many fractures you actually see:
| Caseload Profile | Suitable Program Level | Core Equipment Priority |
|---|---|---|
| 🏠 General practice with occasional fractures | Basic orthopedic set | Power drill, K-wire set, external fixator mini |
| 🏥 Mixed practice with regular fracture cases | Intermediate set | Full power set, plate system, external fixator |
| 🏨 Specialist/referral orthopedic practice | Complete orthopedic suite | All power systems, full implant inventory, C-arm |
The Golden Rule: Match Investment to Realistic Volume
Underpurchasing — too basic a set for your caseload — leaves surgeons frustrated and patients with suboptimal outcomes. Overpurchasing burns capital and creates an instrument management burden. Align your investment with realistic surgical volume projections, not aspirations.
A concrete example: a two-vet general practice seeing eight fracture cases a year does not need a plate system and a C-arm; it needs a solid power set, a mini fixator, and pins. A referral hospital running three orthopedic surgeons, by contrast, would cripple its caseload on a Tier 1 set. Revisit the numbers every twelve months — caseloads shift faster than most owners expect.
🔧 Power Tools
The Heart of Your Veterinary Orthopedic Instrument Set
Battery-Powered Bone Drill — The Cornerstone
The veterinary bone drill handles screw holes, K-wire insertion, and external fixator pin placement. Specifications worth checking:
- 🎯 Speed range: 0–1,500 RPM (adequate for all small animal drilling)
- 🔩 Chuck: universal quick-release (AO/SYNTHES pattern) or Jacobs chuck for non-standard bits
- 🔋 Battery: 10.8V Li-ion; dual battery kit recommended
- 🧼 Sterilizability: full handpiece autoclave-compatible (134°C)
- ⚖️ Weight: under 500 g handpiece for prolonged use
Vsun Medical recommendation: a standard 10.8V cordless drill with dual-battery dock and AO quick-release chuck serves most small to medium practices well. Speed control matters clinically: slow-speed drilling prevents thermal necrosis, and the quick-release chuck lets you swap between K-wire and screw driving mid-procedure without breaking scrub.
Battery-Powered Oscillating Saw
The oscillating saw cuts bone for osteotomies (TPLO, corrective), amputations, and cortical trimming. Look for 10,000–18,000 oscillations per minute, a universal quick-release blade system, and blades in both small (cat/small dog) and standard (medium dog) sizes. Ideally it shares the drill’s battery platform.
Budget note: if funds are tight initially, a wire saw (Gigli) can cover emergency amputations — but any practice planning TPLO or corrective osteotomy should strongly prioritize an oscillating saw. Blade selection is anatomy-driven: a cat tibia wants a small curved blade, a Labrador femur wants a standard one, and the right blade makes the difference between a clean cut and a shattered cortex.
Battery-Powered Wire Driver — Start Here
Inserting K-wires and Steinmann pins, holding temporary reduction, placing cerclage wire — the wire driver does it all. Specs: 0–800 RPM, a dedicated K-wire chuck (1.0–3.0 mm), and the same battery platform as your drill.
Many practice owners buy this one first: the wire driver is the most versatile, most-used orthopedic power tool in general small animal practice — often before a drill is even acquired. Speed control is the feature that matters most: slow, controlled revolutions keep the pin track straight and the bone cool, which shows up directly in healing outcomes.
🦴 Fixation Hardware
External Fixator System
A mini external fixator set is invaluable in small animal orthopedics:
- Type I (unilateral) mini system: pins 1.0–2.5 mm; bars 4–6 mm; basic clamp set
- Pin inventory: 1.0 mm, 1.5 mm, 2.0 mm half-pins — five of each as a starting stock
- Bar inventory: three to four bars in 100–150 mm lengths, plus two in 50–80 mm for small frames
For medium and large dog capability, add a standard fixator set (2.5–4.0 mm pins; 8–10 mm bars). New to fixator sizing? Our guide on Small Animal Fracture Repair: Mini External Fixators covers the basics.
K-Wire & Steinmann Pin Set
Every small animal practice needs: K-wires in 0.8, 1.0, 1.2, 1.5, 1.8, and 2.0 mm — a full set of ten per size; Steinmann pins in 2.0, 2.4, and 3.0 mm for intramedullary pinning; and cerclage wire, 20–24 gauge, in a 10-pack.
Bone Plate System (If Budget Allows)
A basic veterinary plate system (2.7 mm and 3.5 mm DCP or LCP plates with matching screws) expands fracture management options substantially. Procurement cost is significant, so consider phased acquisition after the core power tools and external fixator are in place. Many practices run for years on power tools and external fixation alone — plates are a capability expansion, not a foundation piece.
🩺 Hand Instruments: The Essentials
Essential Supporting Instruments
| Instrument | Purpose | Priority |
|---|---|---|
| Bone reduction forceps (pointed & serrated) | Grasping bone fragments for reduction | Essential |
| Periosteal elevator (Freer & Langenbeck) | Soft tissue reflection from bone | Essential |
| Bone curette (small & medium) | Fragment removal, debridement | Essential |
| Bone holding forceps | Maintaining reduction during fixation | Essential |
| Self-retaining retractor (Gelpi, baby Weitlaner) | Wound exposure | Essential |
| Mallet (small, stainless) | Bone impaction, chisel use | Essential |
| Osteotome/chisel set (small) | Cortical bone work | Recommended |
| Rongeur (small Luer pattern) | Fragment trimming | Recommended |
| Depth gauge | Measuring screw length | Essential (if using plates) |
| Tap & tapping handle | Cutting screw threads | Essential (if using plates) |
The pattern is simple: the instruments marked Essential earn their place in every set, while the Recommended ones can wait until your caseload justifies them. When in doubt, prioritize reduction and exposure tools first — they make every procedure easier.
🗺️ A Phased Acquisition Roadmap
You do not have to buy everything on day one, and most successful practices do not. A practical three-year approach:
- Year 1: wire driver + drill, K-wire and pin set, mini external fixator, essential hand instruments — this covers the majority of simple fracture cases
- Year 2: add the oscillating saw and a standard external fixator set once TPLO and comminuted fracture volume justifies it
- Year 3: bone plate system, expanded implant inventory, and — if referral-level caseload supports it — a C-arm
Phasing spreads capital out over time, lets surgical volume drive spending, and gives your team room to build skill with each new capability before the next arrives.
One final thought on tiers: they are a starting framework, not a straitjacket. The right set for your practice is the one that matches your actual caseload, not the one that looks most complete in the catalog.
🧼 Sterilization & Storage
Keeping Your Veterinary Orthopedic Instrument Set Surgery-Ready
All orthopedic instruments must stay cleanable and autoclave-compatible. The essentials:
- 🗂️ Dedicated instrument trays per tool category (power tools, fixators, hand instruments)
- ♨️ Autoclave with adequate capacity — a minimum 21-liter pre-vacuum unit is recommended
- 🧪 Sterilization indicator strips and batch tracking for surgical quality assurance
- 📦 Instrument wrapping supplies: CSR wrap or pre-formed sterilization pouches
How often should you service the tools? Power tool handpieces need professional service — bearing inspection, seal replacement, calibration — every 200–300 autoclave cycles or annually, whichever comes first. Hand instruments get a quick inspection for deformation, corrosion, and sharpness before every procedure, and trays deserve deep cleaning plus a full condition assessment quarterly.
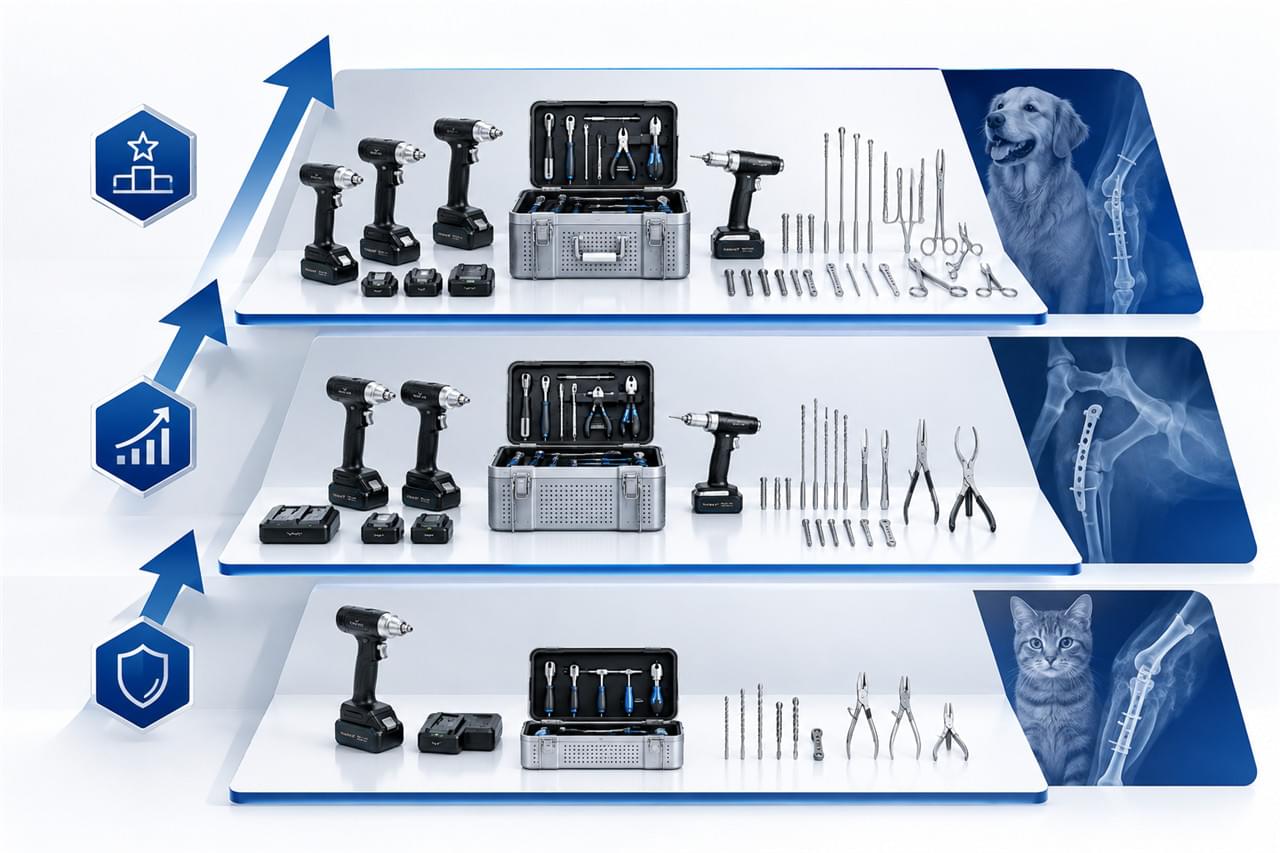
💰 Budget Planning: 3 Tiers
Budget Tiers for Your Veterinary Orthopedic Instrument Set
Whichever tier you land in, the structure is the same: power tools first, fixation hardware second, implants last.
Tier 1: Essential Start ($3,000–6,000 USD)
- Wire driver + drill (shared battery platform)
- K-wire and Steinmann pin set
- Mini external fixator system
- Essential hand instruments (reduction forceps, periosteal elevator, retractors, curettes)
What is the true minimum to start? A workable entry point for small animal fracture repair runs roughly 2,000–3,700:abattery−poweredwiredriver(2,000–3,700:abattery−poweredwiredriver(800–1,500), K-wire and Steinmann pin set (200–400),miniexternalfixatorset(200–400),miniexternalfixatorset(500–1,200), and essential hand instruments ($300–600). That gets you basic diaphyseal fracture management via external fixation and intramedullary pinning.
Tier 2: Full Small Animal Capability ($6,000–12,000 USD)
- Tier 1 + oscillating saw
- Standard external fixator system
- Basic bone plate system (2.7 mm DCP/LCP)
- Expanded hand instrument set
Tier 3: Specialist/Referral Level ($12,000–25,000+ USD)
- Full power system with multiple battery sets
- Complete external fixator range (mini through standard)
- Full implant system (plates, nails, arthroplasty components)
- C-arm (fluoroscopy) — essential for advanced animal orthopedic surgery
Do you need a C-arm? Highly recommended for accurate guide wire and pin placement. Many practices start without one, relying on post-reduction radiographs and anatomic landmarks — but as case volume grows and you add TPLO or THR, intraoperative fluoroscopy becomes progressively more important for consistent outcomes.
⚠️ 5 Procurement Mistakes to Avoid
Even well-funded practices stumble on the same five traps:
- Buying implants before power tools — the plate system looks impressive but is useless without a drill to place it
- Mixing battery platforms — three tools, three chargers, three spare battery inventories; unify instead
- Ignoring sterilization capacity — a great instrument set paired with an undersized autoclave becomes a bottleneck
- Choosing on price alone — the cheapest handpiece rarely survives 300 autoclave cycles
- No after-sales plan — when a handpiece fails mid-week, you need a supplier who answers the phone
None of these are fatal if caught early. They are exactly the kind of thing a checklist prevents.
🤝 Choosing Your Supplier
5 Criteria for Evaluating Veterinary Surgical Equipment Partners
When evaluating veterinary surgical equipment suppliers, check:
- GMP manufacturing standards — product consistency and quality assurance
- 2-year warranty minimum — confidence in product durability
- Small MOQ availability — clinics don’t need container loads
- Technical documentation — user manuals, sterilization guides, surgical technique references
- Responsive after-sales support — troubleshooting and spare parts
Price matters, but total cost of ownership matters more. A drill that costs 20% less but fails after a year of autoclave cycles is no bargain. Ask suppliers for sterilization cycle data, replacement part availability, and repair turnaround times before signing — the answers separate equipment partners from equipment vendors.
Can human instruments work for animals? Some human orthopedic instruments translate well, especially for medium and large dog surgery where bone dimensions resemble human anatomy. For small animal and feline work, purpose-designed veterinary mini instruments are necessary for correct sizing — and mixing human and veterinary instruments demands careful verification of size and design compatibility. Our comparison of Veterinary vs. Human Surgical Power Tools digs into the differences. For sourcing strategy at scale, the Global Medical Device Sourcing Guide is a good read, and the AVMA veterinary practice standards set the baseline expectations for clinic equipment.
✅ Build Your Veterinary Orthopedic Program with Confidence
Vsun Medical supplies complete veterinary orthopedic instrument kits — from essential starter configurations to full specialist suites — with GMP manufacturing standards, ISO certification, and a 2-year warranty. Flexible MOQ options mean even a growing clinic can start right.
📋 Request Veterinary Equipment Quote → vsunmedical.com/contact
Or explore the full veterinary orthopedic tools product range.
The Veterinary Orthopedic Society member resources are worth bookmarking as you build out your program.
GMP Compliant · ISO Certified · 2-Year Warranty · Flexible MOQ
 English
 Arabic
 German
 French
 Italian
 Spanish
 Russian
 Japanese
 Korean
 Turkish
 Portuguese